Making Chips. Basic cuts used in whittling
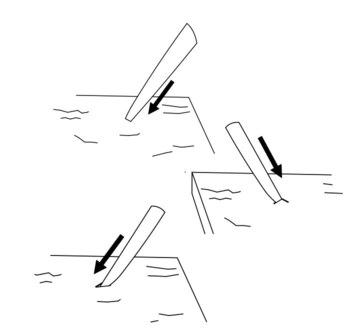
Tips for carving across the grain.
• Begin with light, shallow cuts to establish your carving lines without putting too much pressure on the wood fibres. • Instead of pushing your carving tool forcefully across the grain, try slicing cuts at an angle to reduce resistance and minimise tear-out. • Regularly sharpen your carving tools to maintain a keen edge. Dull tools are more likely to tear wood fibres when carving across the grain
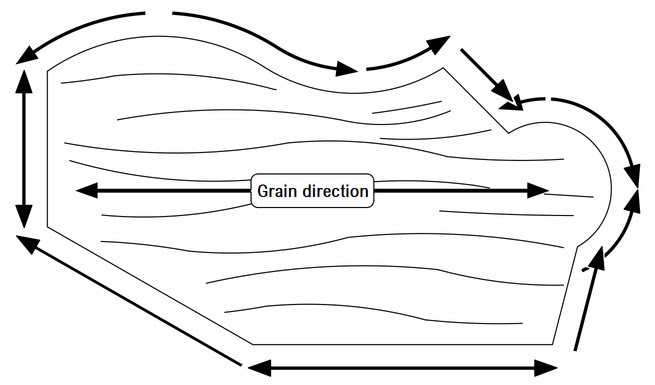
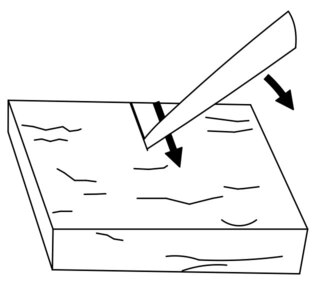
Cut direction and grain
Understanding wood grain is crucial when it comes to carving wood effectively. The grain of the wood refers to the direction of the wood fibres or cells within the wood's structure. How you carve relative to the grain can significantly impact the ease of carving, the finish quality, and the overall strength and appearance of your carved piece.Wood can be categorised into end grain sometimes called short grain (cut across the growth rings) and long grain (cut along the length of the log). End grain appears as circular patterns, while long grain appears as straight lines. Look closely at the surface of the wood to identify the direction of the grain. Be aware though that grain patterns can vary widely depending on the type of wood and how it was cut. If you’re unsure, test carve a small area to understand how the wood grain behaves with your carving tools.Long grain is easier to carve and allows for smoother cuts and shaping. Always carve in the direction of the wood grain for cleaner cuts and smoother surfaces. Best cut directions are shown by the arrows in figure (above). Turn your work-piece in your hands to make it easier to carve in these directions.Invariably you will have to carve against the at some stage. Sharp carving tools are essential for working effectively especially across the grain, dull tools can tear wood fibres.
There are several basic cuts commonly used in whittling to create different shapes, textures, and details in wood. Here are some fundamental cuts used in whittling.
When making any cuts ensure that your knife is sharp. The object is to CUT the wood away, if the chip doesn't pop out don't be tempted to pry it out with the knife tip as you may bend or snap the tip off. Instead, recut until the chip is loose.
Stop Cut
This cut is made by pushing the knife down into the wood making a stop cut along an edge you want to keep prevents the wood from splintering beyond the stop cut as you cut away the waste wood. If the area you wish to cut if small or on the corner of the peice simply pushing the blade or point of the knife into the wood is sufficent. For longer stop cuts use the following techneque: • Visualize the lines and edges you want to define or separate. • Hold the carving tool firmly in your dominant hand. Maintain a steady grip to have full control over the tool during the cutting process. • Position the cutting edge of your tool on the wood surface where you want to begin the stop cut. • Apply pressure with the tool to start cutting into the wood.
• As you approach the endpoint of the stop cut, be cautious not to cut beyond the desired line.
• Finish cutting just before reaching the edge of the workpiece bringing the knife over and into the the corner co complete the cut.
You may deepen the cut by applying more pressure or making repeated passes with the tool.
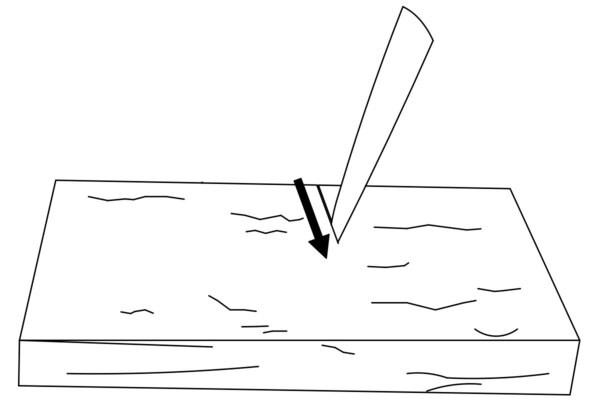
Start cutting into the wood.
.jpg)
Approaching the endpoint of the stop cut,
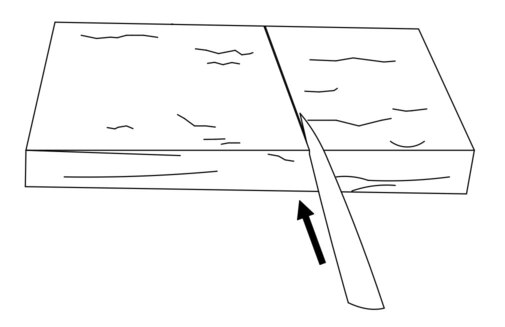
As you reach the edge of the piece bring the knife over and cut into the corner edge.
Push Cut
Onve mastered this is a one of the most useful cuts in your arsenel, It's a safe cut to use as you can only take small slices.
Use the Thumb of your off hand to help push the knife through the wood. Pull the knife handle back in a rotating action whilse pushing through, using your thumb as a fulcrum.
Adjust the attack angle of the knife slightly to change the direction of the cut or create bevels.Use multiple passes and adjust your technique as needed to achieve the desired result.** Be aware that the off hand is the one that usually gets cut. Keep the fingers away from path of the blade if there’s a slip.
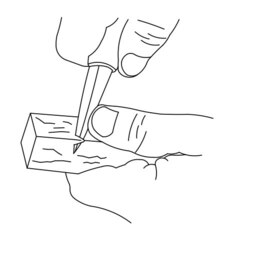
Push through using your thumb as a fulcrum.
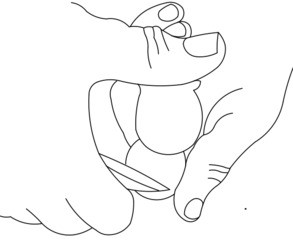
Pull the knife smoothly to remove a thin slice of wood.
Pull Cut
The pull cut is a fundamental technique used in wood carving and whittling to remove wood efficiently and create smooth, controlled cuts.Place your thumb at the end of the workpeice then pull the knife smoothly and steadily to remove a thin slice of wood. It’s a squeezing a action between thumb and blade pulling the knife towards it. It you're cutting through the end of the be sure to keep the supporting thumb below where the blade will pass if it slips
** You must always wear a thumb guard when making this cut.
Vee Cut
The Vee cut is used to create V-shaped grooves or decorative details in wood. This versatile cut made with a detail knife can be used for defining edges, creating texture, or adding depth to your carving projects. This cut is very similar to the stop cut with the blade placed at a different angle.
Place the blade of the knife at an angle to the wood surface where you want to start the Vee cut and make the first cut. The angle will determine the width and depth of the V-shaped groove.Adjust the angle of the knife to the opposite side of the initial cut to create the other arm of the V-shape. It’s often easier to rotate the workpiece through 180 degrees to make the second cut. After forming the V-shaped groove, inspect the cut to ensure it has clean edges and meets your desired shape and depth.Use the tip of the knife to clean up any rough edges or corners to achieve a crisp and defined Vee cut.
Make the first cut.

Adjust the angle to create the side of the Vee.
Chip Cut
The chip cut, somtimes called the pyramid cut, involves removing small chips of wood and is a great technique to create details, accents, or depth in your wood carving project.
The idea is to use the point of your knife to make three intersecting cuts causing a small pyramid to be popped out.
If the chip doesn't pop out then you've not cut deep enough, don't try to pry it out!
Use three stabbing cute to eject a small pyramid.